Chokopop
Self-diagnosed FM addict
- Joined
- Mar 10, 2011
- Messages
- 4,120
- Reaction score
- 44
- Points
- 48
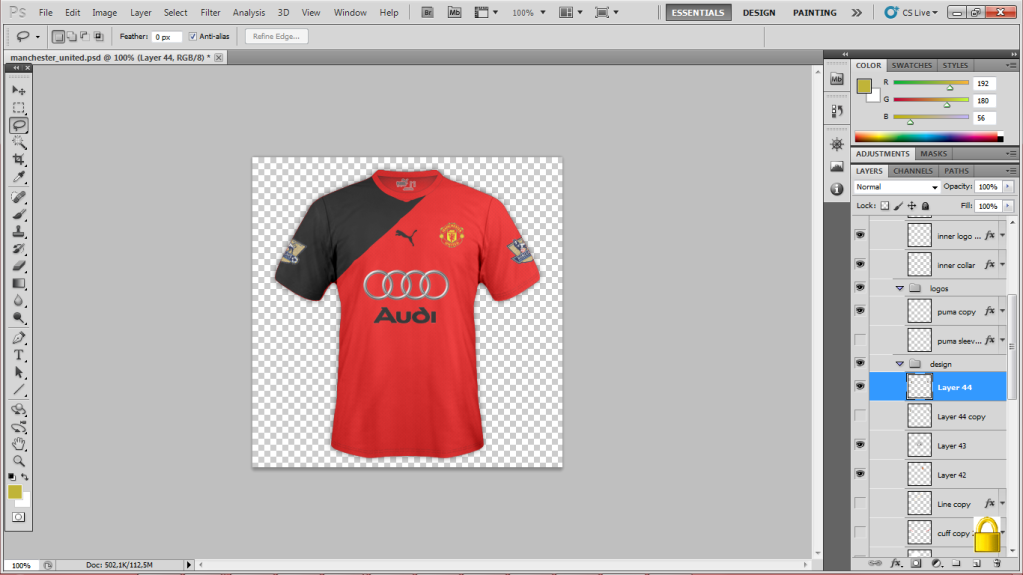
Alright, a lot of people might not now how to do this, so i thought i'd post a tutorial on it.
Also, thanks to jmoser for showing me how to do so a while back.
Go to google and type: *** League Sleeve Patches.
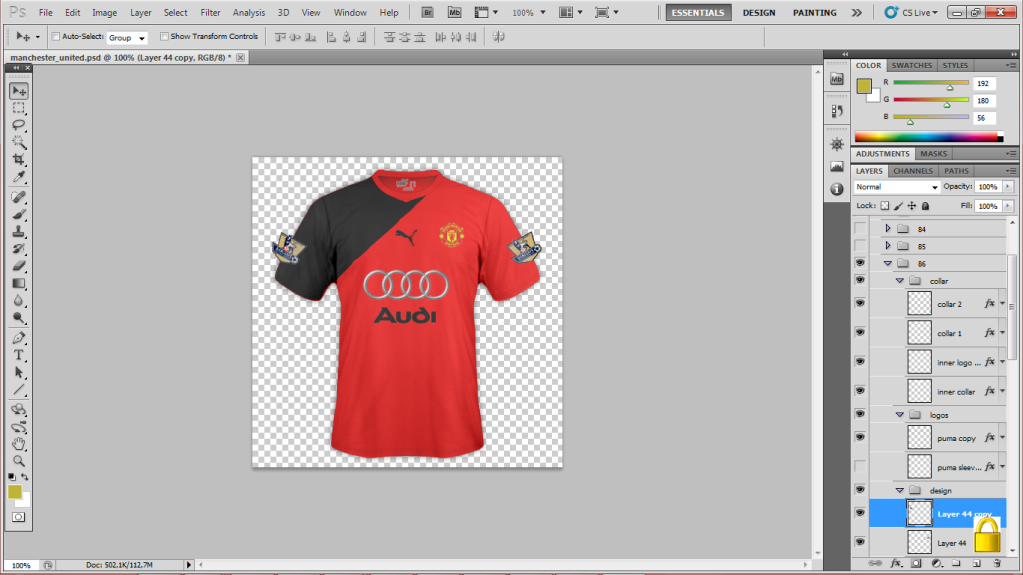
Put them like this:
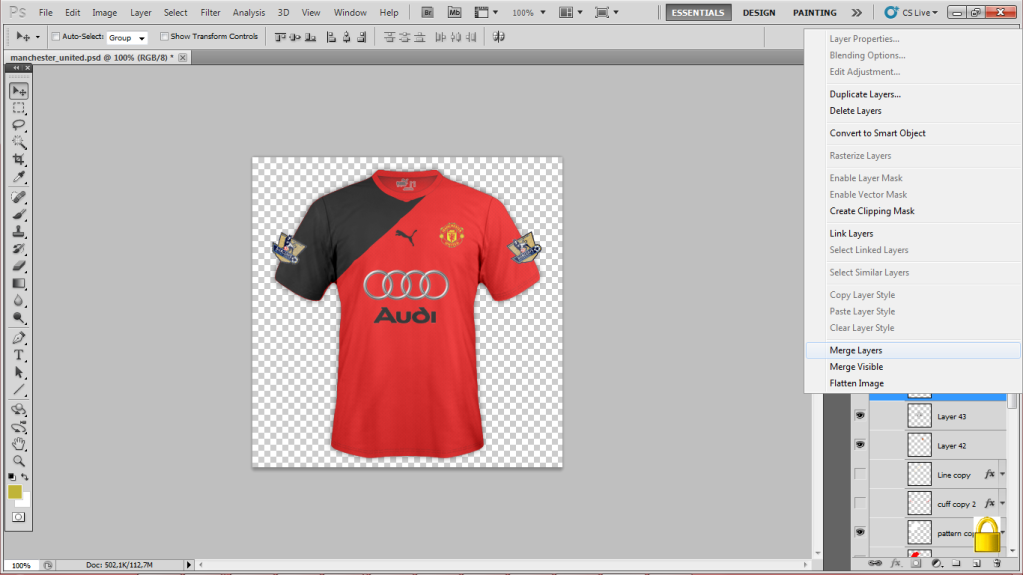
Next, select both sleeve patch files and select "Merge Layers"
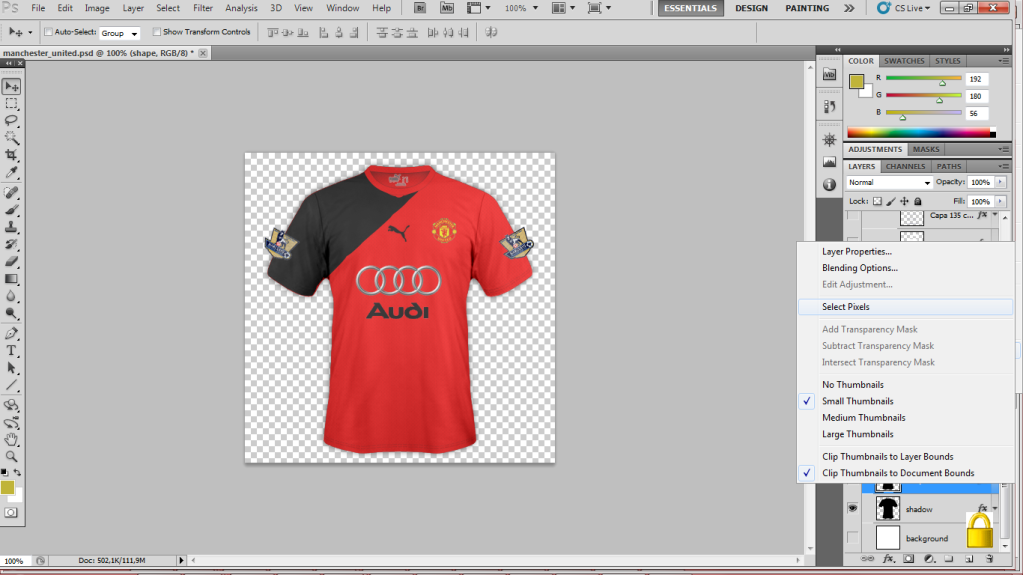
Next, go down to the bottom where it says "Shape" and select "Select Pixels"
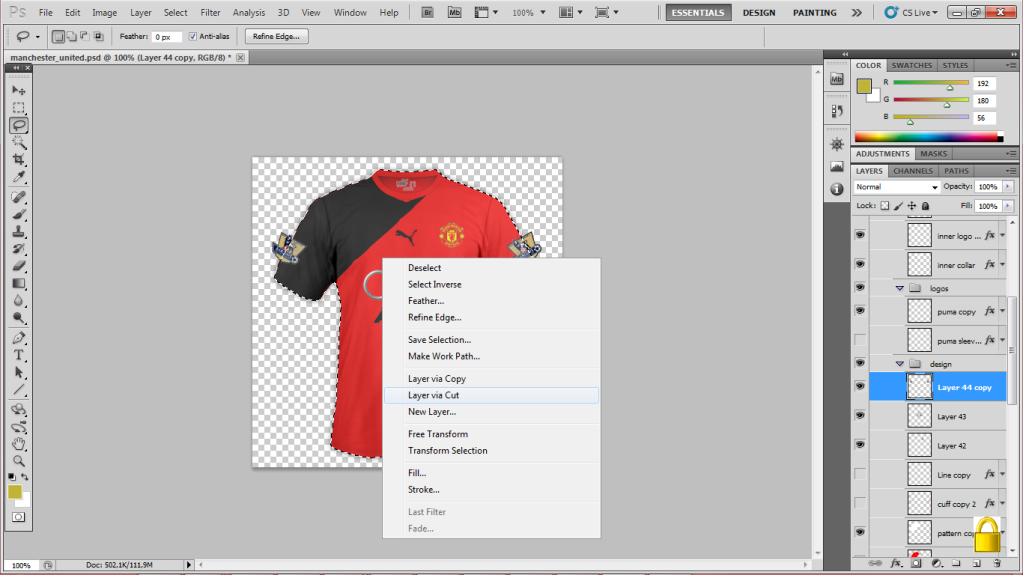
Then, go back up. Select the merged Sleeve Patch layers, and select either the "Lasso Tool" or the "Rectangular Marquee Tool" and right click on the shirt, and press "Layer via Cut"
And VOILA! There you have it!
Also, thanks to jmoser for showing me how to do so a while back.
Go to google and type: *** League Sleeve Patches.
Put them like this:
Next, select both sleeve patch files and select "Merge Layers"
Next, go down to the bottom where it says "Shape" and select "Select Pixels"
Then, go back up. Select the merged Sleeve Patch layers, and select either the "Lasso Tool" or the "Rectangular Marquee Tool" and right click on the shirt, and press "Layer via Cut"
And VOILA! There you have it!
