You are using an out of date browser. It may not display this or other websites correctly.
You should upgrade or use an alternative browser.
You should upgrade or use an alternative browser.
Kit making tutorial with Photoshop
- Thread starter Neall
- Start date
- Replies 101
- Views 129K
brommers92
Member
- Joined
- Jan 25, 2011
- Messages
- 535
- Reaction score
- 0
- Points
- 0
how do you make the config files for the kits ?What you need
Photoshop
Kit template - Get them from Stuw's thread here
Tutorial
1. Extract your template folder using winRAR or another extracting software
2. Open photoshop, it should look like this after its opened. View attachment 116126
It may look slightly different depending on your version of photoshop.
3. Open a kit template by File > Open then locate your template folder, click on the brand you want, then open the .psd file, it should look something like this View attachment 116127
4. Your Photoshop window should look like this View attachment 116129
5. To choose the template you wish to use, click on the eye logo next to the template number View attachment 116130
6. Once you have chosen your template go to the bottom of the list and there should be a layer called base or colour, something along tose lines, well double click this layer and click colour overlay View attachment 116131
7. Double click on the coloured square and now you can choose your colour View attachment 116132
8. Now scroll back up and do the colour overlay with the layers in the template folder.
View attachment 116134
9. Once you have done that its time to insert logos, Google the club name and you should find a logo easily, right click on it copy, then paste it into photoshop.
View attachment 116135 make sure the badge is below the texture layer or it will look ugly.
10. To get rid of the white around white around the logo, we use a tool called the magic wand View attachment 116136 Click this logo
11. Now, click on the white bits you want to get rid of, and press backspace <--
12. Press and hole Ctrl+T and it should bring up a "resizer" square around your badge, Hold Shift and drag a corner until its a decent size.
13. Press View attachment 116137 that allows you to move a layer, now move your logo into position. View attachment 116141
14. Now we need a sponser, Google for the sponser company and get the logo, and do the same as before, magic wand the white bits away, ctrl+T to resize then move it into position.
15. use colour overlay to change the sponser colour.
16.View attachment 116142 now save the file as.png
View attachment 116143

If you want to resize to use in game, click image, image size View attachment 116144 the size varies for different template, but 200x200
Post your results !
If its a good template, then just change the colour overlay on the seperate parts
How do you get the sepearte parts ??
I want the shoulders to be a different colour, i only learned how to use photoshop about a fortnight ago and still learning everyday..
sam.england
Member
- Joined
- Jul 1, 2010
- Messages
- 42
- Reaction score
- 0
- Points
- 0
Awesome tutorial!!
Spent far too long playing around and not enough time on the game now....
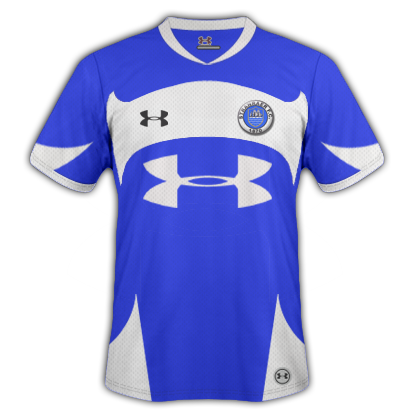
My first attempt

Spent far too long playing around and not enough time on the game now....
My first attempt

Black_Pearl
Member
- Joined
- Jan 29, 2011
- Messages
- 30
- Reaction score
- 0
- Points
- 0
MadDogAleckz
Member
- Joined
- Jun 29, 2009
- Messages
- 85
- Reaction score
- 0
- Points
- 0
how do i get the kits i made into my game??
AlastairRyan
Member
- Joined
- Feb 26, 2011
- Messages
- 231
- Reaction score
- 0
- Points
- 0
---------- Post added 06/04/2011 at 09:12 PM ---------- Previous post was 04/04/2011 at 09:44 PM ----------
My first attempt: I can't put it in game, although i have made a config file using graphics guru?

My first attempt: I can't put it in game, although i have made a config file using graphics guru?

Last edited:
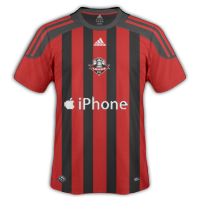
Here's my first kit
View attachment 165184
Now how do I install it? I made a Graphics>Kit folder, but it's not working :S
View attachment 165184
Now how do I install it? I made a Graphics>Kit folder, but it's not working :S
sidgurung97
Member
- Joined
- Dec 2, 2010
- Messages
- 1,482
- Reaction score
- 0
- Points
- 0
Here's my first kit
View attachment 165184
Now how do I install it? I made a Graphics>Kit folder, but it's not working :S
You have to make a config
For your kit - The Man United badge needs to be bigger, sponser a tad bigger and lifted, except that it's fine
You have to make a config
For your kit - The Man United badge needs to be bigger, sponser a tad bigger and lifted, except that it's fine
How do you make a config?
And thanks for the advice
Edit - NVM.
Last edited:
str8tfaded
Member
- Joined
- May 2, 2011
- Messages
- 18
- Reaction score
- 0
- Points
- 0
Well dont know if you've found out how to do a config as i dont see they have replied but i've been looking around and found a post where they explain how to so here you go :
http://www.fm-base.co.uk/forum/skins-all-other-graphics/47971-how-make-config-files-add-game.html
now if anyone can answer me this... i've never done any kits but i will begin learning soon.. my question is can i use photoshop 9 or does it have to be a specific photoshop?
http://www.fm-base.co.uk/forum/skins-all-other-graphics/47971-how-make-config-files-add-game.html
now if anyone can answer me this... i've never done any kits but i will begin learning soon.. my question is can i use photoshop 9 or does it have to be a specific photoshop?